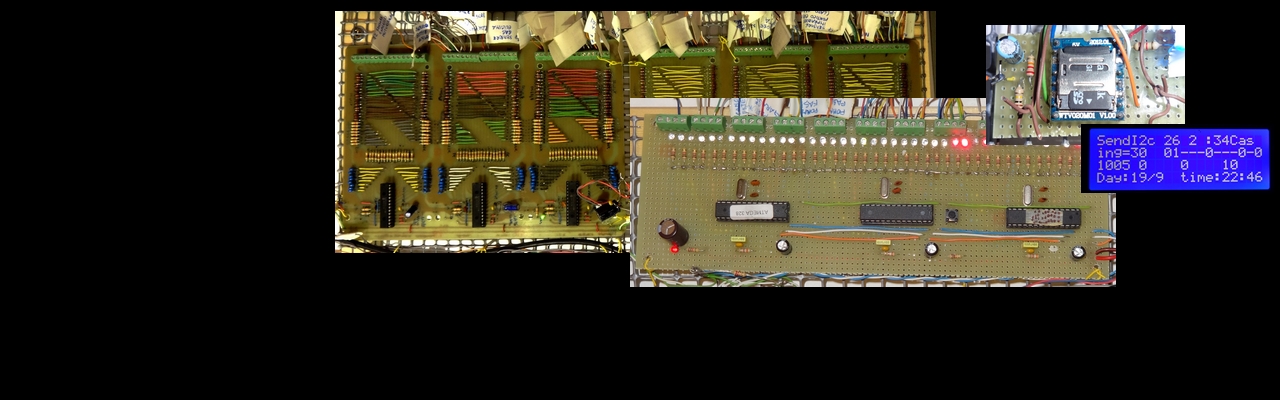
WTV020-SD-16P in automation home
The WTV020-SD-16P module for Arduino to play files in order of arrival (use buffer).
The particularity of this sketching is its characteristic of being easily integrated in other projects and accept multiple file numbers to play even if they arrive while the card WTV020-SD-16P it is playing one. It works thanks to a buffer in which to store the files which then sends one behind the other to the wtv020-sd-16p module to play them without interruption. Namely send one, expected to be finished playing before sending the second carrier and so on.
The code listings is in the queue and is a set of routines designed to be placed in another program.
With the routine Wtv_Playsong (x) is added to the file number to be played in the buffer. It can be launched multiple times even if the wtv020-sd-16p module has not finished playing the previous file.
The buffer can store up to 12 numbers. However, be modified at will by changing the variable Wtv_ElementiVettore and initializing to zero all the elements of the vector.
The program deletes from the buffer repetitions of numbers. If you pass one after the other numbers following files 2,2,2,3,3,2,2,3 the program will play 2,3,2,3 because the program automatically deletes all equal neighbors values.
If the buffer is full all the numbers successive files replace only the last element of the buffer.
The program also manages the automatic repetition of an audio file. If you send the command to play the file number 99, this is played, at the same time and put back in the queue buffer. A useful feature to repeat the two tones of a siren continuously and at play also other files that have since arrived in the buffer.
The repeat function is stopped only by the arrival of file number 98. When the value is entered, immediately as the first element of the buffer to be played immediately and simultaneously all occurrences of 99 if present in the buffer are deleted. Useful feature to play a sound file that says for example “Alarm off” and put an end to play the audio file of the siren.
As I mentioned these are routine to add to your program. Routines that are called from Wtv_PlaySong (x).
The following listing allows you to test its functionality. The contents of the loop () generate the calls to the function to play some files. For use remember to insert audio files in memory card with that number (Ex: for Wtv_PlaySong (2) there must be a file named 0002.ADF for Wtv_PlaySong (32) a file named 0032.ADF and so on.) The schematic of the connections is as follows:

Some audio files, in italian language to test the schetch, below:
| File name:
|
Voice that says in italian language…
|
| File: 0001.ad4 | Light room 2 |
| File: 0002.ad4 | Wall light room 1 |
| File: 0003.ad4 | Wall Light room 2 |
| File: 0098.ad4 | Allarm activated |
| File: 0099.ad4
|
Siren
|
To insert the sketch in other programs, you have to copy the declarative and all the routines in the queue to your program and enter in the loop () the if statement that contains the call to the routine Wtv_SendToWtv020sd16 (). This routine is the one that sends the first element of the buffer to form WTV020-SD-16P and then expect it to be finished to be performed before starting to send in a new file.
The routine WTV020SD16P is called multiple times per second so that its functions are performed in parallel to the program that hosts it.
The code (arduino sketch):
// Questo progaramma è inteso per essere inserito in un programma più complesso.
// Le sue funzioni permettono di suonare diversi file con la schedina WTV020SD16p.
// I file da suonare possono arrivare insieme o in modo casuale ed inseriti in un vettore. Poi verranno suonati, per intero, uno dietro l’altro.
// Collegare i pin così:
// Wtv20sd16p Pin <-> Arduino Pin
// 1 <-> 2
// 7 <-> 3
// 8 <-> to GND
// 10 <-> 4
// 15 <-> 5
// 16 <-> to 3,3V
//
// Collegare una resistenza da 1K in serie ad un led tra i pin 16 e 15 della scheda Wtv20sd16p. Il positivo del led verso il 16
#include <Wtv020sd16p.h>
int resetPin = 2; // The pin number of the reset pin.
int clockPin = 3; // The pin number of the clock pin.
int dataPin = 4; // The pin number of the data pin.
int busyPin = 5; // The pin number of the busy pin.
Wtv020sd16p wtv020sd16p(resetPin,clockPin,dataPin,busyPin);
double old_millis;
double old_millis2;
double old_millis3;
int Wtv_ElementiVettore=11;
int Wtv_VettArrivo[12] = {0,0,0,0,0,0,0,0,0,0,0}; //il vettore va da 0 a 11
void setup() {
//Initializes the wtv020-sd-16p module.
Serial.begin(115200); // set up Serial library at 115200 bps
wtv020sd16p.reset();
old_millis=0;
old_millis2=0;
old_millis3=0;
}
void loop() {
//ciclo da eliminare, utile per testarlo, dopo 90 secondi suona il file 98
if (millis()-old_millis3 >= 100000 )
{
Serial.println(“———————– metto il 98 ————-“);
Wtv_PlaySong(98);
old_millis3 = millis();
}
//ciclo da eliminare, utile per testarlo, dopo 50 secondi suona un pò di file
if (millis()-old_millis2 >= 60000 )
{
Serial.println(“———————– metto un po di play ————-“);
Wtv_PlaySong(1);
Wtv_PlaySong(99);
Wtv_PlaySong(2);
Wtv_PlaySong(32);
Wtv_PlaySong(2);
Wtv_PlaySong(2);
Wtv_PlaySong(2);
Wtv_PlaySong(2);
Wtv_PlaySong(3);
old_millis2 = millis();
}
//L’if seguente è quello da mettere nel loop del programma principale
//Poi da qualsiasi punto del programma si può mettere l’istruzione Wtv_PlaySong(3) per fargli suonare, in questo caso, il file 0003.ad4;
if (millis()-old_millis >= 50 )
{
Wtv_SendToWtv020sd16();
old_millis = millis();
}
}
void Wtv_PlaySong(int numerofile)
{
//metti il valore in numero file in coda al vettore.
//Però se è 98 allora cancella tutti i 99 presenti nel vettore e metti il 98 per primo in modo da suonarlo subito.
//Se invece il valore in numerofile è uguale all’ultimo elemento precedentmente inserito allora non fa nulla.
int Wtv_appo = 0;
int Wtv_esci=0 ;
//il primo valore è vuoto allora mettilo direttamente
if (Wtv_VettArrivo[0] == 0)
{
Wtv_VettArrivo[0] = numerofile; //è il 98
Wtv_esci=1;
}
if (numerofile!=98 && Wtv_esci==0)
{
Wtv_appo = 0;
Wtv_appo = Wtv_posizione();
if (Wtv_appo >=1 && Wtv_VettArrivo[Wtv_appo-1]==numerofile )
{
//in pratica se il valore è uguale a quello precedente allora non lo metti nel buffer
}
else
{
Wtv_VettArrivo[Wtv_appo] = numerofile;
}
}
//Se 98 elimina tutti i 99 e mettilo nel buffer
if (numerofile==98)
{
Wtv_appo = 0;
Wtv_appo = Wtv_posizione(); //trova il primo valore a zero, così non faccio il for per tutti gli elementi
int Wtv_i = 0;
//elimina tutti i 99 e 98 nel vettore
while (Wtv_i <= Wtv_appo )
{
if (Wtv_VettArrivo[Wtv_i] == 99 || Wtv_VettArrivo[Wtv_i] == 98 )
{
Wtv_shiftvettore (Wtv_i);
}
else
{
Wtv_i=Wtv_i+1;
}
}
//sposta tutto il vettore in basso per poter mettere in prima posizione il 98
for (int Wtv_i = Wtv_appo ; Wtv_i>=1 ; Wtv_i–)
{
Wtv_VettArrivo[Wtv_i] = Wtv_VettArrivo[Wtv_i-1];
}
Wtv_VettArrivo[0] = numerofile; //è il 98
}
}
void Visualizza()
{
//Per visualizzare gli elementi del vettore
int i=0;
for (i=0; i<=Wtv_ElementiVettore; i++)
{
Serial.print( i ) ;
Serial.print( ” -> ” ) ;
Serial.println( Wtv_VettArrivo[i]) ;
}
Serial.println(“”) ;
}
void Wtv_SendToWtv020sd16()
{
int Wtv_appo =0;
if (digitalRead(busyPin) == 0 ) //solo se la scheda non sta suonando faccio quanto segue
{
//Se è 99 allora riproponilo in coda sempre
if (Wtv_VettArrivo[0] == 99)
{
Wtv_appo = Wtv_posizione();
if (Wtv_appo == 1 || Wtv_VettArrivo[Wtv_appo – 1] != 99)
{ //se l’ultimo valore è già 99 allora non farlo
Wtv_VettArrivo[Wtv_appo] = 99;
}
}
if (Wtv_VettArrivo[0]!=0) //se non è zero suonalo
{
wtv020sd16p.playVoice(Wtv_VettArrivo[0]); //suonalo
Wtv_shiftvettore(0); //shift-a il vettore cosi che la prima posizione viene sostituita dalla seconda e così via…
Visualizza();
}
}
}
void Wtv_shiftvettore(int start)
{
//sposta tutti gli elementi. Da START+1 vengono portati di una posizione indietro.
int Wtv_esci = 0;
int Wtv_i=0;
Wtv_i = start;
while (Wtv_i <= Wtv_ElementiVettore – 1 && Wtv_esci == 0)
{
Wtv_VettArrivo[Wtv_i] = Wtv_VettArrivo[Wtv_i + 1];
if (Wtv_VettArrivo[Wtv_i] == 0 && Wtv_VettArrivo[Wtv_i + 1] == 0)
{Wtv_esci = 1;}
Wtv_i = Wtv_i + 1;
}
Wtv_VettArrivo[Wtv_ElementiVettore] = 0;
}
int Wtv_posizione()
{
//Questa funzione restituice il numero del primo elemento libero del vettore al fine di poterlo utilizzarlo.
//La ricerca avviene tramite metodo dicotomico per ridurre il numero di cofronti necessari
if (Wtv_VettArrivo[0] == 0 )
{
return 0 ;
}
else
{
int Wtv_inizio = 0;
int Wtv_mezzo = 0;
int Wtv_fine = 0;
Wtv_fine = Wtv_ElementiVettore;
while (Wtv_fine – Wtv_inizio > 1)
{
Wtv_mezzo = int((Wtv_inizio + Wtv_fine) / 2);
if (Wtv_VettArrivo[Wtv_mezzo] == 0 )
{
Wtv_fine = Wtv_mezzo;
}
else
{
Wtv_inizio = Wtv_mezzo;
}
}
return Wtv_fine; //restituisci valore
}
}
Update 15/01/2017:
The SD card, after years of operation, has stopped working and the new SD 1GB and 2GB (same brand SANDISK) wtv020-sd-16p module did not work. Finally, after many tests, only SD cards 1GB have resumed to work again due to formatting done with SDFORMATTER.